


How to Patch Test an IPL Device: A Step-by-Step Guide to Safer Hair Removal

There exists a unique form of optimism associated with the experience of unboxing one’s newly acquired at-home device. One had already made their necessary enquiries and looked up some reviews, and they were ready to start. Then you see the instruction that says, 'Do a patch test before anything else.'
It is tempting to skip it. Your skin looks fine, you are not especially sensitive, and you have used plenty of skincare products without issue. But a patch test for an IPL device is a different thing entirely from testing a new moisturiser. The energy involved is not chemical — it is light-based, and your skin's response to it depends on variables that are not always visible or predictable.
This article clarifies what an IPL patch test really means, why it deserves to be done right, and how you can perform it – regardless of whether you use the Ulike Air 3 or some other device. This information is not meant to discourage you – most people complete the procedure without any problems and go straight to the first treatment. However, knowing what you should expect and why helps make things a lot clearer
What Is a Patch Test in the Context of IPL?
The phrase "patch test" gets used across a lot of different contexts — from hair dye to false lash adhesive — so it is worth being clear about what it means specifically for IPL.
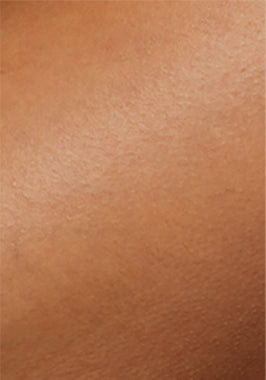
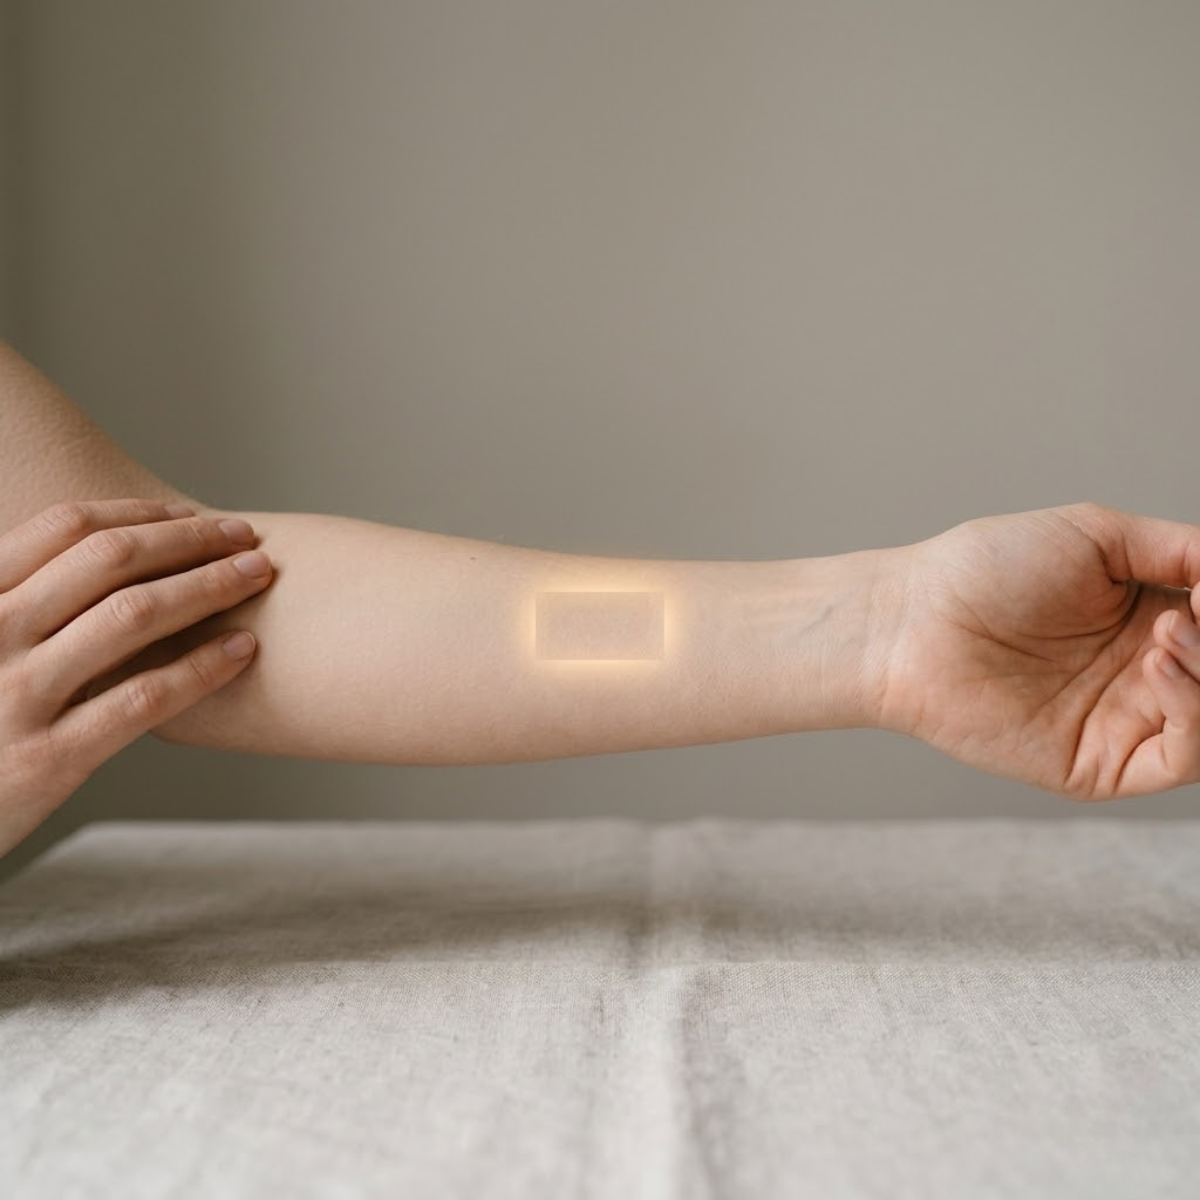
An IPL patch test is a controlled trial of the device on a small area of skin, carried out before you begin treating any larger or more visible body part. You apply one or a few flashes of light to a discreet spot, at the lowest intensity setting, and then observe how your skin responds over the following 24 to 48 hours.
The purpose is not to test for an allergic reaction in the way you would with a skincare ingredient. It is to assess how your skin responds to concentrated pulsed light energy in general, and specifically at the intensity level you intend to use. Some individuals will experience no response whatsoever from their skin, while others may notice some degree of redness or sensitivity that fades away after a couple of hours. However, there are a few cases where one’s skin will not be able to tolerate the environment.
How is it different from a skincare patch test?
The purpose of doing the skin test is to determine whether that particular ingredient can cause irritation or allergic reactions on your skin. This reaction can only happen because of the chemistry within your skin.
In the case of IPL, everything changes. IPL is done using high-energy light pulses, which are directed at the hair follicles through melanin, where the light pulses convert into heat. Therefore, the light pulses work based on melanin. This is why not only the skin tone but also the colour of hair becomes relevant.
As it involves a heating process, it means that your reaction is not dependent on how sensitive you are towards a particular ingredient, but on how suitable it is for your skin tone and hair.
Why Is Patch Testing Important Before IPL Treatment?
The short answer is that skin's response to light-based energy is individual, and you cannot reliably predict it in advance just by looking at your skin.
Your skin's response to light-based energy
Most people know that IPL is not suitable for all skin tones — and that is because of how IPL technology works. IPL targets melanin, the pigment in your hair. The contrast between the melanin in the hair and the melanin in the surrounding skin determines how selectively the device can deliver its energy. On lighter skin with darker hair, that contrast is high, and the device can work efficiently. On darker skin, the contrast is lower, and the surrounding skin absorbs more of the light energy — which increases the risk of discomfort, redness, or in some cases, changes in pigmentation.
But skin tone is only one part of the picture. The state of the skin can also be a determining factor on a particular day. When skin is lightly sunburnt, newly bronzed, or sensitised by a recent waxing or shaving, it will have a different reaction than when skin is in its normal state. Changes in hormone levels change skin sensitivity. Some medications increase photosensitivity in the skin. This does not make the skin unique; rather, it makes it what it is – living tissue that is dynamic.
A patch test accounts for all of this. It gives you a small, low-stakes data point from your own body, which is more reliable than any general guidance.
Risks of skipping the patch test
Most of the risks associated with skipping a patch test are not dramatic. For the majority of people, the worst that would happen is some temporary redness or irritation in the treated area.
But in some cases — particularly where skin tone, medication, or recent sun exposure has not been accounted for — the consequences can include burns, blistering, or post-inflammatory hyperpigmentation, where the skin darkens in response to irritation.
These are not common outcomes, but they are avoidable ones. A patch test takes around ten minutes and requires a 48-hour wait. That is a reasonable exchange for confidence that your skin and the device are going to work well together.
How to Do a Patch Test with an IPL Device: Step by Step

Choosing the right area for your patch test
Pick an area that closely resembles the skin you plan to treat, in terms of tone and thickness. If you intend to use the device on your legs, a good test site is the inner forearm or inner calf — areas that are usually less sun-exposed and have relatively thin skin. If you are planning to treat your underarms, the inner arm near the armpit is a reasonable proxy.
Don’t conduct a patch test on:
The face, neck, or any other thin/fragile-skin area (first-time users should avoid this)
Skin with any mole, freckle, or even visible veins
Skin that has open wounds or rashes
Areas with any tattoo or that are much darker or lighter in skin tone
Selecting the correct intensity setting
Always begin at the lowest intensity setting your device offers, regardless of your skin tone, hair colour, or how confident you feel. The patch test is not the moment to find your optimal setting — it is the moment to confirm your skin's baseline tolerance.
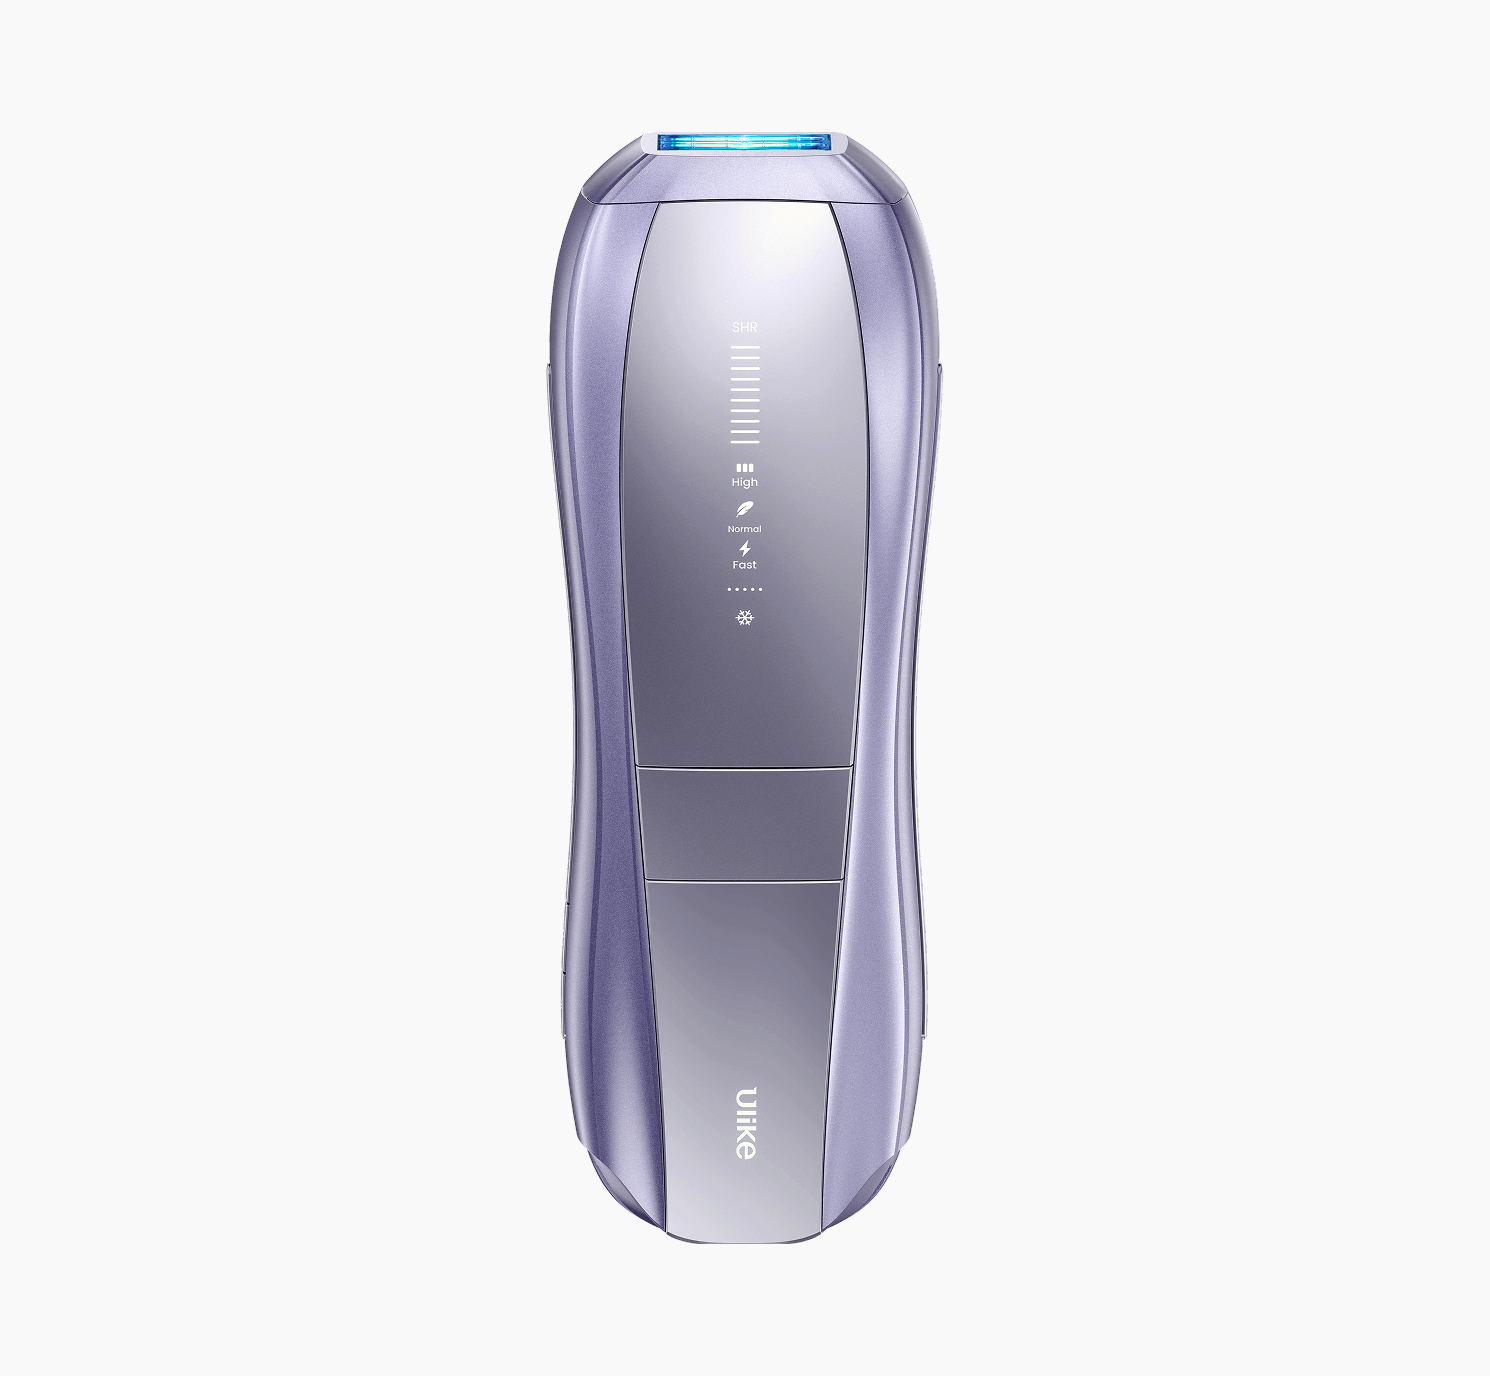
If the device has a skin tone sensor, engage it as you would for a normal session. The Ulike Air 3, for example, uses an automatic skin tone detection function that adjusts the recommended intensity level accordingly. This is a useful safeguard, but it does not replace the patch test — it informs which intensity range is appropriate to test within.
Step-by-step instructions
Before you begin: Have the patch testing site shaved 24 hours before performing the test. Make sure that no waxing, threading, or chemical hair removal creams are used on the site. The device targets hair beneath the skin's surface — the follicle — and shaving leaves that in place while removing surface hair that would otherwise absorb energy inefficiently and cause unnecessary discomfort.
On the day of the test:
Clean the region gently and allow it to dry completely before applying any moisturisers or suntan lotion to the previously tested area.
Wear the goggles provided along with your device. This is not optional — the light emitted during IPL is intense enough to be damaging to the eyes without protection.
Place the device's flash window flat against the skin on your chosen test site. Make sure there is full contact with the skin.
Select the lowest intensity setting
Press the flash button once to produce one flash of light.
Now shift the apparatus by a few millimetres and repeat the process to produce one or two additional flashes of light, thereby illuminating a small testing region.
The diameter of a coin of about 50 pence is sufficient.
Record the exact time, intensity level used, and any sensations felt. Any sensation felt should be minimal, usually just a warm sensation or a slight snap-like sensation. Pain sensations are not normal
After flashing: No active skincare treatments, such as retinoids, AHAs, or other similar ingredients, should be used on the testing area. A fragrance-free moisturiser may be applied to dry or irritated skin.
Now wait. The 48-hour observation window starts from the moment of the last flash.
What to Look for After Your IPL Patch Test
This is the part most people underestimate. The patch test is not just about what happens in the first few minutes — the 24 to 48 hours that follow are where the meaningful information is gathered.
The 24 to 48 hour observation window
Re-inspect the test site intermittently; once after an hour of the test, once the next morning, then once again at 48 hours. The criteria will differ somewhat at each of these stages.
Within the first hour, some slight reddening of the treatment site, along with a slight warming sensation, is perfectly natural. The skin has reacted to the light energy absorbed by it, and this will subside in the coming hours.
By 24 hours, all signs of inflammation should be greatly reduced, if not entirely gone. There should be slight sensitivity on the treated site compared to the rest of the skin, but no signs of anger or discomfort.
By 48 hours, the skin should be looking and feeling just as good as ever. Should this be the case, without exhibiting any adverse effects discussed below, you should feel confident proceeding with your first treatment session.
Signs of a normal response vs a reaction to be aware of
Normal:
Mild redness in the treated area that settles within a few hours
A temporary feeling of warmth or tightness
Slight sensitivity if you press on the area
Perifollicular oedema — small, temporary bumps around the hair follicles. This is a common response to IPL and generally resolves within 24 hours
Worth monitoring:
Redness lasting for more than 24 hours or one that gets worse instead of better.
Peeling and blisters, no matter how small
Darkening (hyperpigmentation) or lightening (hypopigmentation) of the skin in the area where it was applied
An irritation or hives beyond an hour or two
Severe pain that will not go away
In case any of the above is observed, then a full session should not be carried out. It is best to allow your skin enough time to rest before considering lowering the intensity of IPL treatments in future or using any other treatment that may suit you.
When to seek further advice
If any reaction is severe, involves broken skin, or does not resolve within a few days, it is worth seeking medical advice rather than waiting to see whether it settles. This is particularly relevant for anyone with conditions that affect skin healing, or who is on medication that may have contributed to the reaction.
Common Patch Test Mistakes (and How to Avoid Them)
A patch test only gives you useful information if it is carried out properly. These are the most frequent mistakes, and why they matter.
Testing on a completely different body area from the one you plan to treat. Skin thickness and tone varies considerably across the body. Testing your inner forearm and then treating your face tells you relatively little about how facial skin will respond. Try to match the test site to the intended treatment area as closely as possible.
Using a higher intensity setting than necessary. The patch test is not the moment to find your optimal setting. Start low. If the test goes well, you can incrementally increase the intensity over subsequent sessions.
Not waiting the full 48 hours. It is understandable to check the area after a few hours and conclude that everything is fine. But some responses develop more slowly — particularly pigmentation changes, which may not be apparent until 24 hours or later. Patience here is not excessive caution; it is the whole point of the exercise.
Testing immediately after sun exposure. A darker complexion will mean that your skin is more sensitive to light. You cannot get an idea of how your skin normally reacts if you conduct a patch test when your skin has been tanned by the sun.
Assuming no pain means no reaction. Certain reactions, including changes in pigmentation, do not cause any sensations of pain. The fact that you did not feel any discomfort during your patch testing is positive, although it cannot substitute for a 48-hour visual evaluation.
Skipping the shave beforehand. Using IPL on unshaved skin causes the surface hair to absorb the light energy and burn, which is uncomfortable and entirely unhelpful. Shave 24 hours before.
Who Should Be Extra Cautious with IPL Patch Testing?
IPL is suitable for a wide range of people, but there are groups for whom the patch test is particularly important, and some for whom IPL may not be appropriate at all. This section is not intended to put anyone off — it is intended to help people make an informed decision.
Sensitive and reactive skin types
Just because you have skin that flushes easily, reacts poorly to products, or is generally more red than the average person does not mean you can’t use IPL. You just need to be extra careful when performing the patch test, starting with the lowest settings possible.
Those suffering from rosacea and other skin diseases like eczema or psoriasis that have an impact on the skin barrier function should first consult their dermatologists before making use of any of these lights. This is because their skins might behave unpredictably when exposed to light and heat.

Darker skin tones and the Fitzpatrick scale
The Fitzpatrick classification of skin colour is a method used by dermatologists that determines the type of reaction of your skin towards exposure to sunlight. It ranges from Type I, where your skin is very light, always gets sunburnt, and doesn’t tan at all, to Type VI, where your skin is very dark with no possibility of being sunburnt.
Most consumer-level IPLs are intended for people with Fitzpatrick types I to IV. Skin with types V and VI skin, i.e., medium and dark brown and black, respectively, contains higher levels of melanin in its skin than in its hair.
For people with dark skin, it is crucial to determine what the exact Fitzpatrick scale range is for the machine before anything else. In fact, some modern machines, even newer models of IPL machines, have been created taking into account wider skin tone options; however, there are exceptions here, and a patch test is mandatory.
In case of uncertainty about whether IPL will work well on your skin tone, consulting a dermatologist or any professional aesthetic doctor who works with darker skin types is the best thing to do.

Hormonal skin, tanned skin, and other considerations
Several other factors can affect how skin responds to IPL, even in people who have used devices without issue before:
Medications. Some of the everyday medications can even cause your skin to be more sensitive to the sun, such as some antibiotics, some acne medications using retinoids (ingested or applied to the skin), various antidepressants and even certain blood pressure medications. It is therefore always prudent to make sure that you verify whether or not the type of food that you are currently taking can make you hypersensitive to the light before you end up trying any form of light treatment.
Pregnancy and hormonal changes. Skin can become more reactive during pregnancy, and there is insufficient evidence on the safety of IPL during pregnancy to recommend it. Many practitioners advise against its use as a precaution. Hormonal contraceptives and the menstrual cycle can also influence skin sensitivity, though to a lesser degree.
Recent cosmetic treatments. When you recently had a chemical peel, laser treatment, or microneedling, then your skin barrier will require time to restore before IPL can be used in the same location. The common rule of thumb is to wait a minimum of four to six weeks, but recovery times are different among individuals.
Tattooed or very darkly pigmented areas. The IPL should not be applied directly to tattoos because the pigment found in the tattoo ink can absorb a great deal of energy from the treatment and will likely result in serious burns.
Frequently Asked Questions
How long should I wait after a patch test before my first full session?
At least 48 hours. If your skin is still showing any redness or sensitivity at that point, wait until it has fully settled before proceeding.
Do I need to patch test every single time I use the device?
No. Once you have completed a patch test and confirmed your skin responds well at a given intensity level, you do not need to repeat it before every session. It is worth doing again, however, if you have recently started new medication, had significant sun exposure, or notice that your skin is behaving differently than usual.
What if my patch test shows no reaction at all — does that mean I can use a higher setting?
A clean patch test at the lowest setting is a positive result. It gives you confidence to proceed. You can gradually increase the intensity over subsequent sessions if you feel comfortable doing so, but do this incrementally rather than jumping several levels at once.
Can I do a patch test on my face?
Yes, though be more conservative with your choice of site. The jawline or the side of the neck are commonly used areas for facial patch testing. Avoid testing near the eyes.
My skin looked fine immediately after the patch test — can I skip the waiting period?
No. The observation window exists precisely because some responses take time to develop. Checking immediately after the test gives you very limited information. The 48-hour window is where the useful data is.
I have darker skin and the device says it might not be suitable. What should I do?
Look at the range of skin types that this device supports according to the Fitzpatrick scale. If your skin tone is not included in this list, ask the manufacturer about what you should do next, and also discuss the matter with an experienced dermatologist who knows how to treat darker skin with IPL.
What should I do if I have a reaction?
Stop using the device. Apply a fragrance-free soothing product to the area, avoid sun exposure, and monitor it. If the reaction does not settle within a few days, or if it is severe, seek advice from a GP or dermatologist.
Is the patch test the same for all body areas, or do I need to test each one separately?
The patch test does not need to be repeated for every single body part you intend to treat. However, if you are moving from an area of relatively light skin to an area with a noticeably different tone — or to a more sensitive area such as the bikini line or upper lip — it is sensible to run a brief test on that area first.

Before You Begin: A Patch Test Checklist
A quick reference before your first session:
Shave the test area 24 hours before
Avoid sun exposure on the test site for at least two weeks prior
Do not apply creams, SPF, or active skincare to the area on the day of the test
Put on your protective eyewear before switching the device on
Start at the lowest available intensity setting
Apply two to three flashes to a small test area
Note any immediate sensations
Observe at one hour, 24 hours, and 48 hours
Look for redness, blistering, or pigmentation changes
Only proceed to a full session if the skin looks and feels normal at 48 hours
If you are using the Ulike Air 3, the device's instruction manual includes additional guidance on the patch test process specific to that device — including which intensity settings are recommended for different skin tones. Reading through the manual before your first test is time well spent.
This article is intended for informational purposes and does not constitute medical advice. If you have a skin condition, are taking prescription medication, or are uncertain whether IPL is appropriate for you, please speak to a GP or dermatologist before use.

Hair Removal Before a Wedding: A Realistic Timeline for Smooth, Photo-Ready Skin
IPL Hair Removal UK: Your Complete Guide to Safe, Effective Treatment at Home and in Salon
How to Patch Test an IPL Device: A Step-by-Step Guide to Safer Hair Removal
Explore Beauty
Ulike Air 10
2 weeks to silky smooth skin.
96% Hair Density Reduction in 2 Weeks
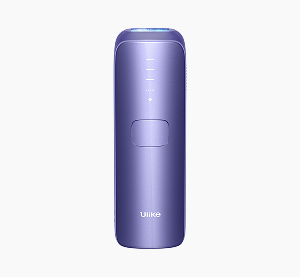
Ulike Air 3
3 weeks to silky smooth skin.
93% Hair Density Reduction in 4 Weeks

Ulike X
3 weeks to silky smooth skin.
94% hair reduction in just 2 weeks*
Ulike Reglow
Clearer skin in 2 weeks: Fewer breakouts
Smoother skin in 4 weeks: Fewer lines, firmer feel